Tips for school device roll out
One of the most exciting and impactful initiatives that schools can undertake is device roll out. Yes, really. Devices transform the way students learn and teachers teach, open up exciting new learning opportunities and interaction beyond the classroom. However, before that schools need to get devices literately into student’s hands. Device hand-out day, device collection day, Chromebook collection corner, whatever you call it, rolling out devices is not without its difficulties.
Successfully distributing devices to students in bulk and at scale requires planning, preparation, and execution. Over the last decade we’ve worked with hundreds of schools helping them simplify their device roll-out. In this blog, we will discuss some of our top tips for school device roll out.
Plan for the complete lifecycle of the device
With the immediate pressure and deadline of getting devices into students hands, planning for what will happen to the device at the end of the school year or end of the devices life may seem like a luxury. However, planning ahead and considering every stage of the Chromebook or iPad lifecycle can impact how devices are deployed to students. For example, if you plan to collect devices at the end of the school year how will you know the correct device has been returned, do you need asset tags, a device inventory, who and how will this be maintained? Plan for the logistics of roll-out. How will devices be allocated to schools, grades, and students? Will devices be collected from student homerooms by grade or as a school in the gymnasium. If you purchase new devices, what will happen to their boxes, they take up more space than you think!
To help plan your device roll out we have created a free template which you can use as a guide to map out the complete lifecycle of your 1:1 devices. The template includes questions which you should consider and prompts for roles, responsibilities, and tasks.
Enlist tech savvy students to help
Get help from tech savvy and senior students. School IT teams are often lean at best, enlisting enthusiastic students can greatly reduce the workload of device rollout. Tech savvy students can check previously used devices for damage such as missing keys or cracked screens. Students can help prepare devices by performing a powerwash ensuring the device is clean for the new user. Students can also help those less tech savvy with basic troubleshooting such as helping them log in to their device for the first time.
Powerwash / Factory reset devices
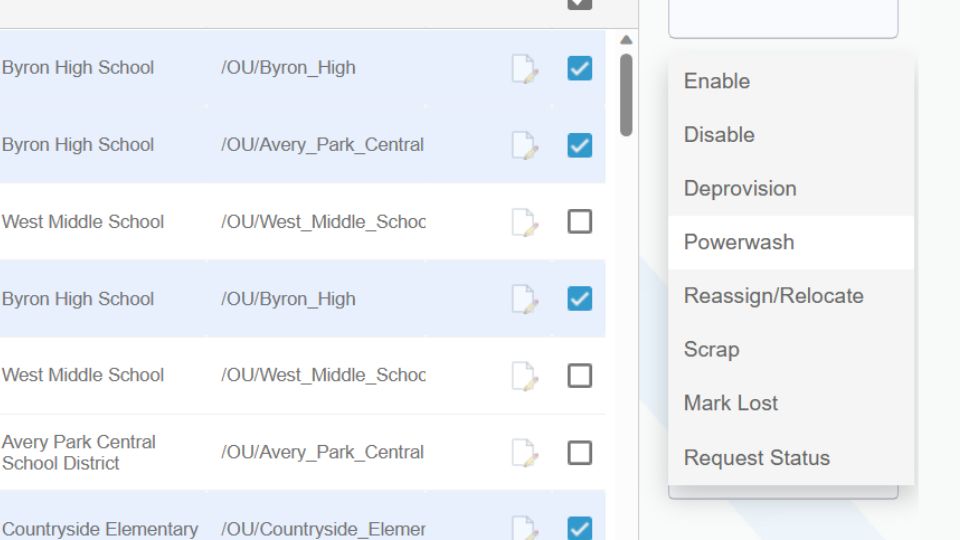
Powerwash is Google’s term for factory reset. Powerwashing is a must when previously used Chromebooks are reassigned at the start of the school year as it removes unnecessary files and often eliminates performance issues, returning devices to a new state (at least from a software perspective). The Google admin console provides functionality to remotely powerwash devices, however for more flexibility and to automate powerwashing consider a tool such as VIZOR. More information on how to bulk powerwash your chromebooks can be found here.
Communicate repair policy
Having a clear and well communicated repair policy can actually reduce the number of repairs by increasing the awareness of responsibility students have for their devices. Device roll-out is a great opportunity to communicate your repair policy to students and provide tips for device care. As mentioned, having a device repair policy can reduce the number of repairs which occur, but for this to happen the policy must be understood by students and families. The repair policy should fit on to a single page and have clear sections. It shouldn’t contain unnecessary information and certainly not legal speak. Use social media and device wallpaper backgrounds to remind students of their responsibility for device care throughout the year.
To help schools get started we have created a template 1:1 device repair policy document. Use this document as a starting point for your own policy, adapting it to your specific requirements.
Keep paperwork to a minimum
Try not to overload students and families with paperwork when collecting their device. Consider creative ways using social media, device wallpapers and signage to keep students informed on how to look after their devices, report damage and proper usage. Communicate these topics throughout the school year in drips and at appropriate timings rather than once in bulk at the beginning of the year. Also consider where physical paperwork is necessary and if it needs to be completed at the actual time of device collection. Can acceptance of usage terms and acknowledgment of device receipt be made before or after collection using electronic systems such as VIZOR?
Use ZTE (Zero-Touch Enrollment) to enrol devices into your MDM
Zero-Touch Enrollment is an alternative to manually enrolling new devices individually into your MDM and 1:1 solution, such as VIZOR. Both Google and Apple provide ZTE solutions for Chromebooks and iPads respectively. With Zero-Touch Enrollment for Chromebooks a pre-provisioned partner (your Chromebook reseller) automatically enrolls your Chromebooks into the Google Admin console, as part of the purchase therefore removing the need to manually enrol devices when they arrive. Click here to learn how ZTE can help with your device roll-out.
Use Asset Tags to identify devices
Consider using asset tag labels to identify your schools devices. Each asset tag should have a unique number which identifies the device in your inventory. The tag can also identify the device as school property and provide a phone number should the device be found. Preprinted Asset tag labels can be purchased cheaply with your required customizations from various online vendors. Device roll-out is often a great opportunity to apply asset tag labels to devices. Labels with barcodes can provide additional benefits increasing accuracy and speed of device check-out and check-in. When selecting an inventory management system for your school make sure it supports open standards for barcode labels and readers.
Student first login
Get students to login to their device as part of the device collection process. Performing an initial login during device collection has many benefits. Firstly, it ensures the device has power. Batteries can drain over the summer, as part of your back to school plan consider how devices will be powered on their first day of collection. An initial login is a great diagnostic test ensuring the screen and keyboard work. First login offers new or younger students with a learning opportunity and a chance for older more tech savvy students to provide guidance. A successful login will ensure Wi-Fi connectivity and pull down the students device policy from your MDM such as Google Admin or Jamf.
Don’t forget about the peripherals!
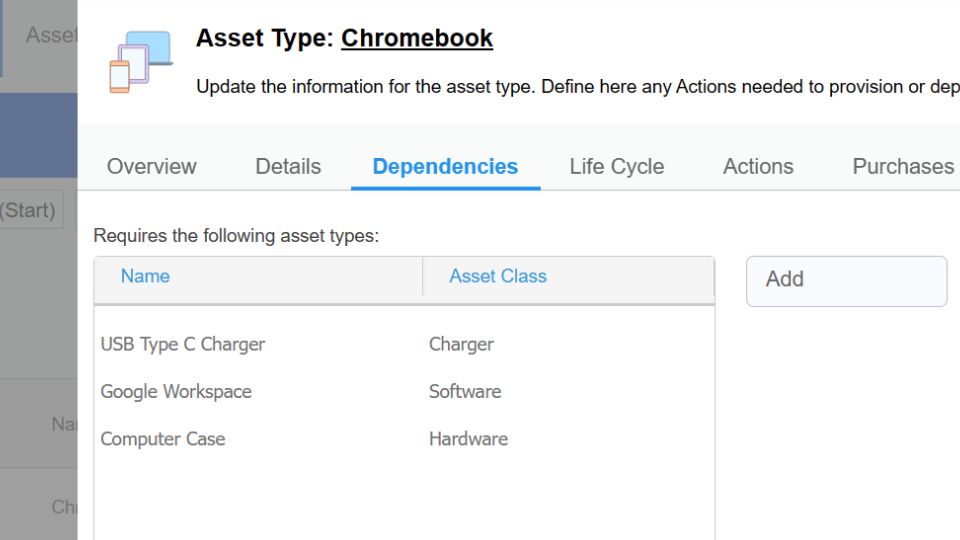
The actual Chromebook or iPad are just one part of the puzzle when handing out devices to students. Devices will need chargers and often a protective case. Some grades or classes may require additional peripherals, like microphones and cameras. How will you keep track of who has what and who will manage returns? To help schools distribute multiple assets or kits to students, VIZOR has implemented asset bundles. Consider if your school could benefit from an asset management solution such as VIZOR to keep track of devices and peripherals.
Use the tech
From Zero Touch Enrolment for Chromebooks to cheap barcode scanners for quick check out, there are lots of options which can speed up and simplify device rollout to students. VIZOR is an IT Asset Management solution designed specifically for schools with the aim of reducing workload, simplifying processes and centralizing device data. One school Tech Director noted that “Before VIZOR, it took minutes to check-out each device, it now takes seconds.”. For more information on how VIZOR can help you with device rollout click here.
How to simplify student device management in your school.
Need a School IT Asset and Device Management Solution?
- Google Admin Sync
- Simplify 1:1 Initiatives
- Track Device Repairs
- Barcode Check-In/Check-Out

